
Robotics & Engineering - Week of 02/09/26 - 02/23/26
Finally, a few weeks without damage! This post contains content spanning across a few weeks of time.
Week 02/09/26
This week (02/09/26) was a commitment to get the broken battery out, new battery in, and BMS balancing everything safely.
Although we have said this the past 3 weeks, this week we were determined to get things done without issues.
To start off the week, we had to identify what was making the BMS and batteries upset in the first place. To do this, I read voltage between the battery terminals (+/-) and the frame of the entire golf cart. I immediately noticed that the negative pole on the batteries were connected to the frame, which is bad. We already knew this, but I confirmed that the 80 volt battery system is supposed to be electrically isolated from everything.
To trace the problem to its root, I started probing. Long story short, I traced things back to a small PCB I made not too long ago (in a recent blog post) responsible for generating a tone as our backup alarm. It had tied the inverter GND and logic level GND wires together resulting in an unwanted connection. I snipped this wire and the short went away, but I wasn’t convinced that this was the problem. The wires used were way too thin to be carrying the damaging current that was clearly flowing when the old battery cell blew up last week.
I decided to disconnect the golf cart negative wire before proceeding. This is how the BMS was configured last week:
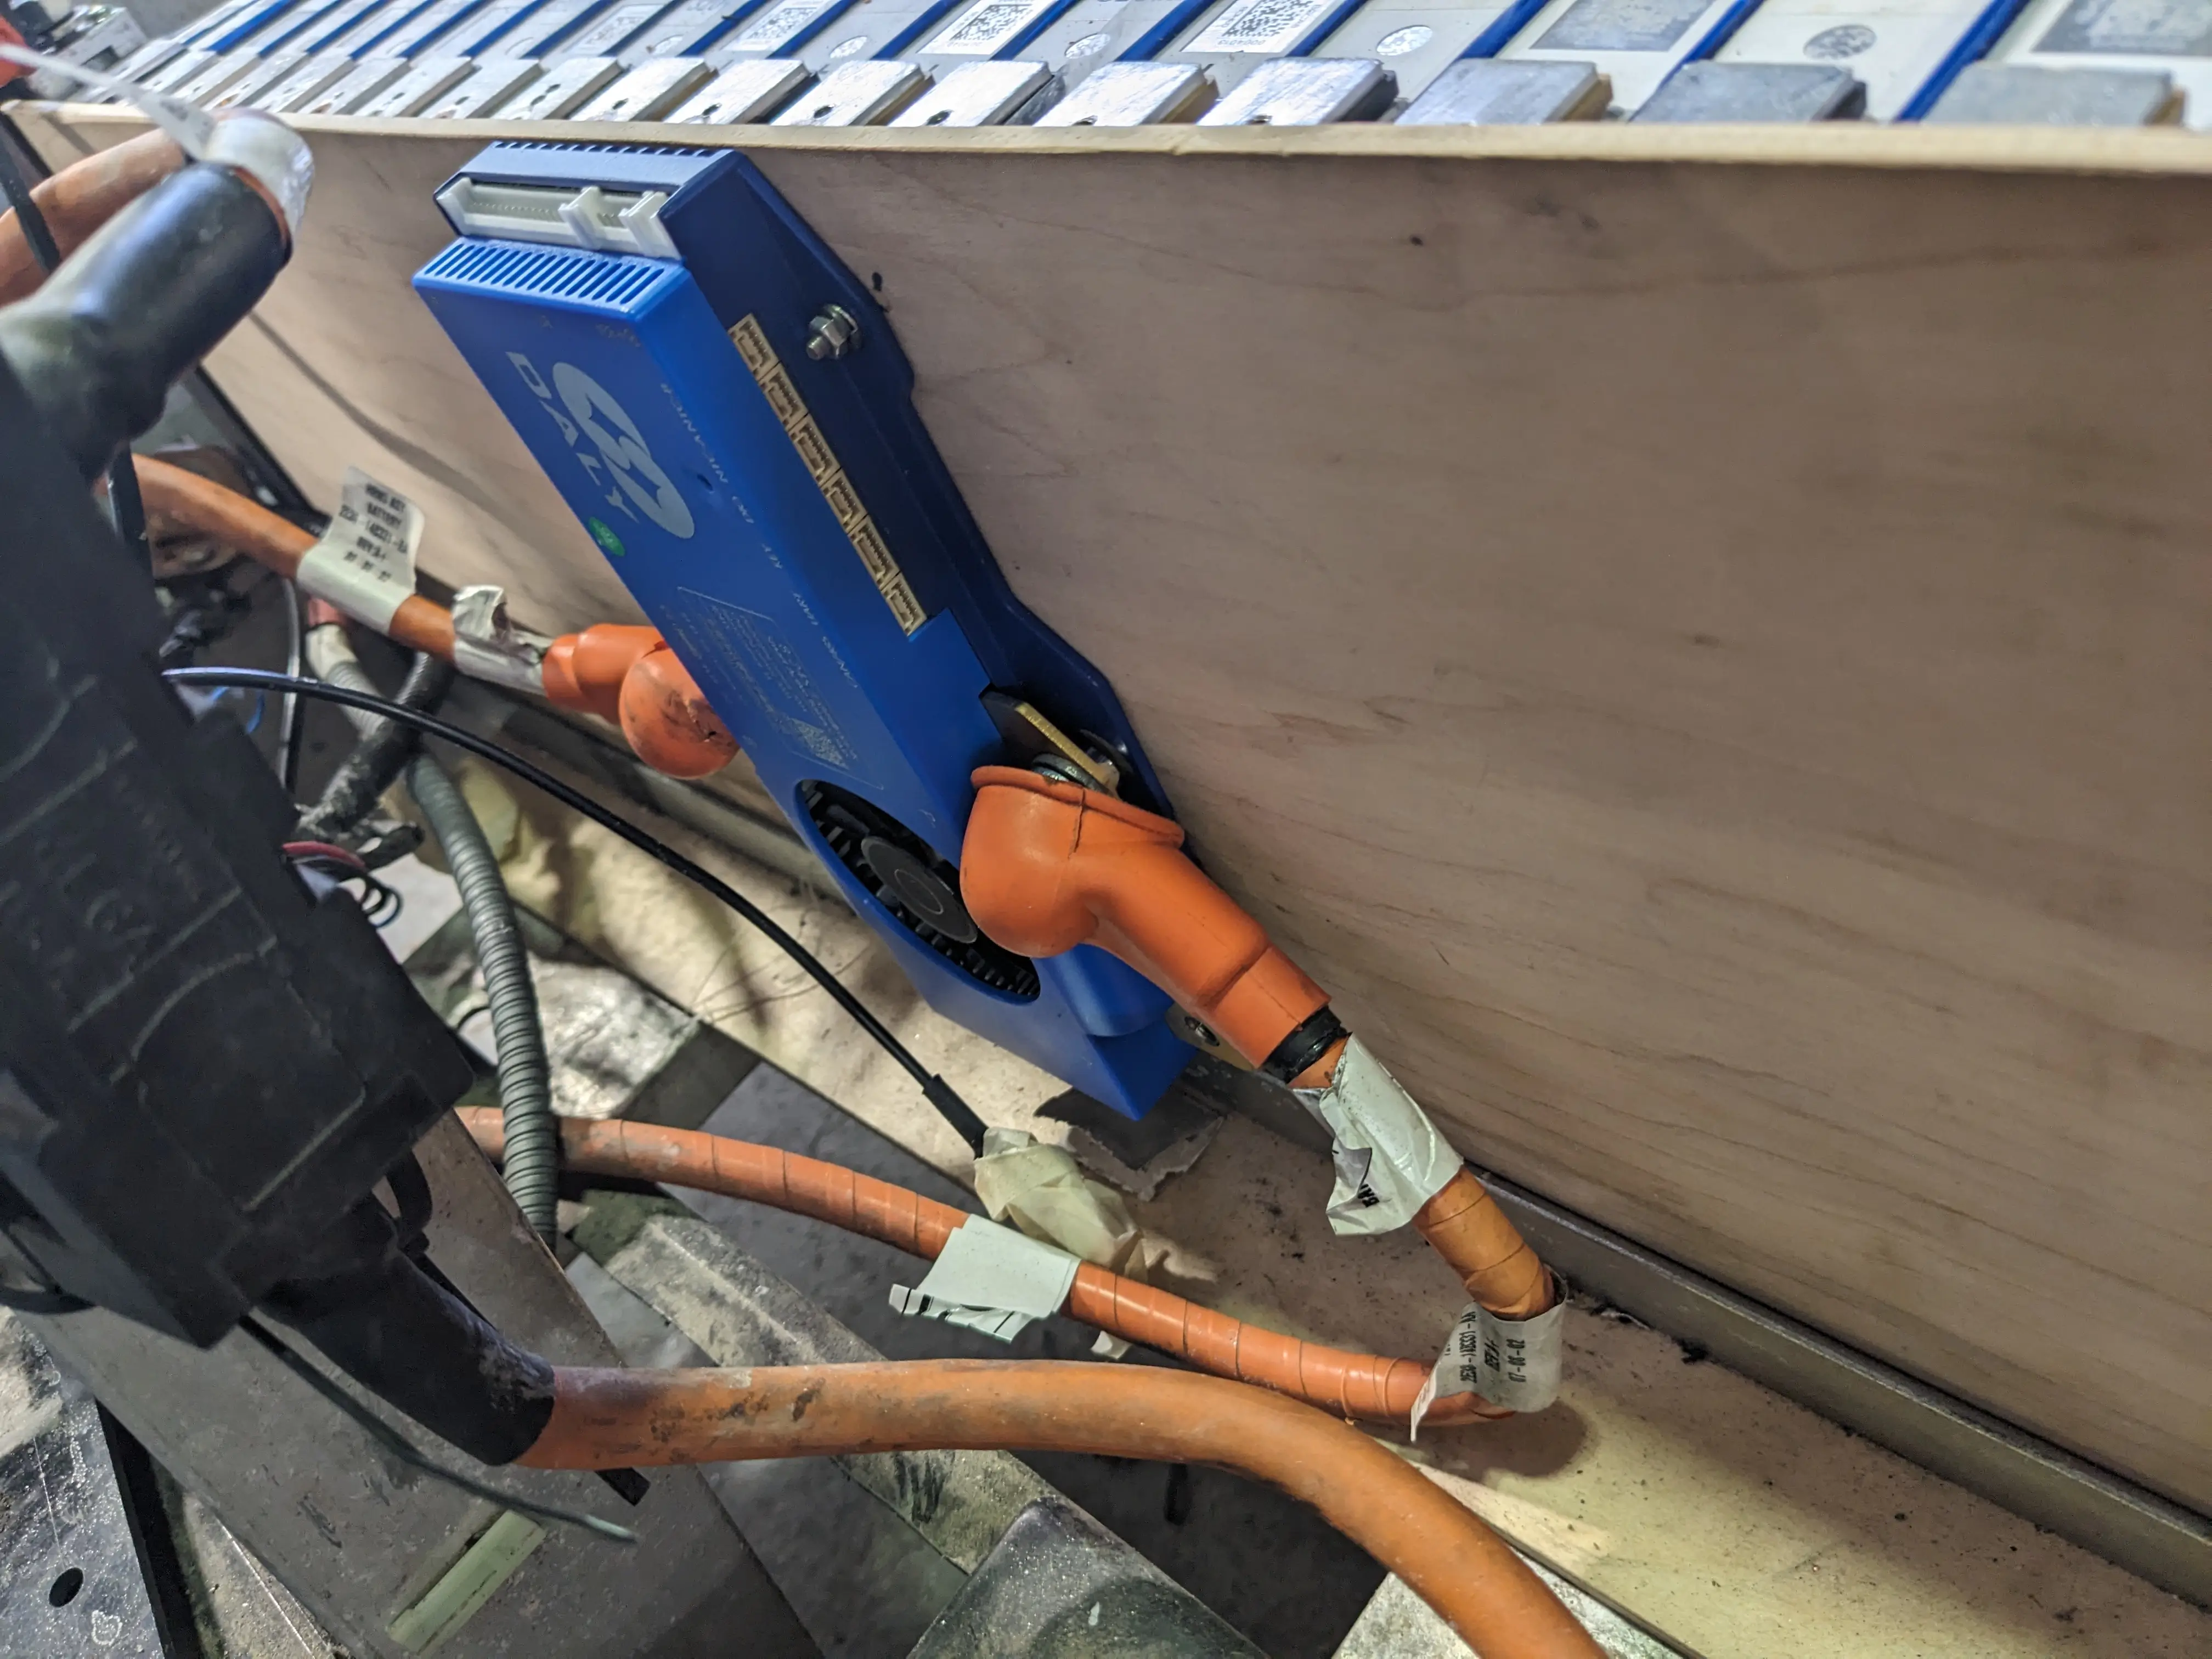
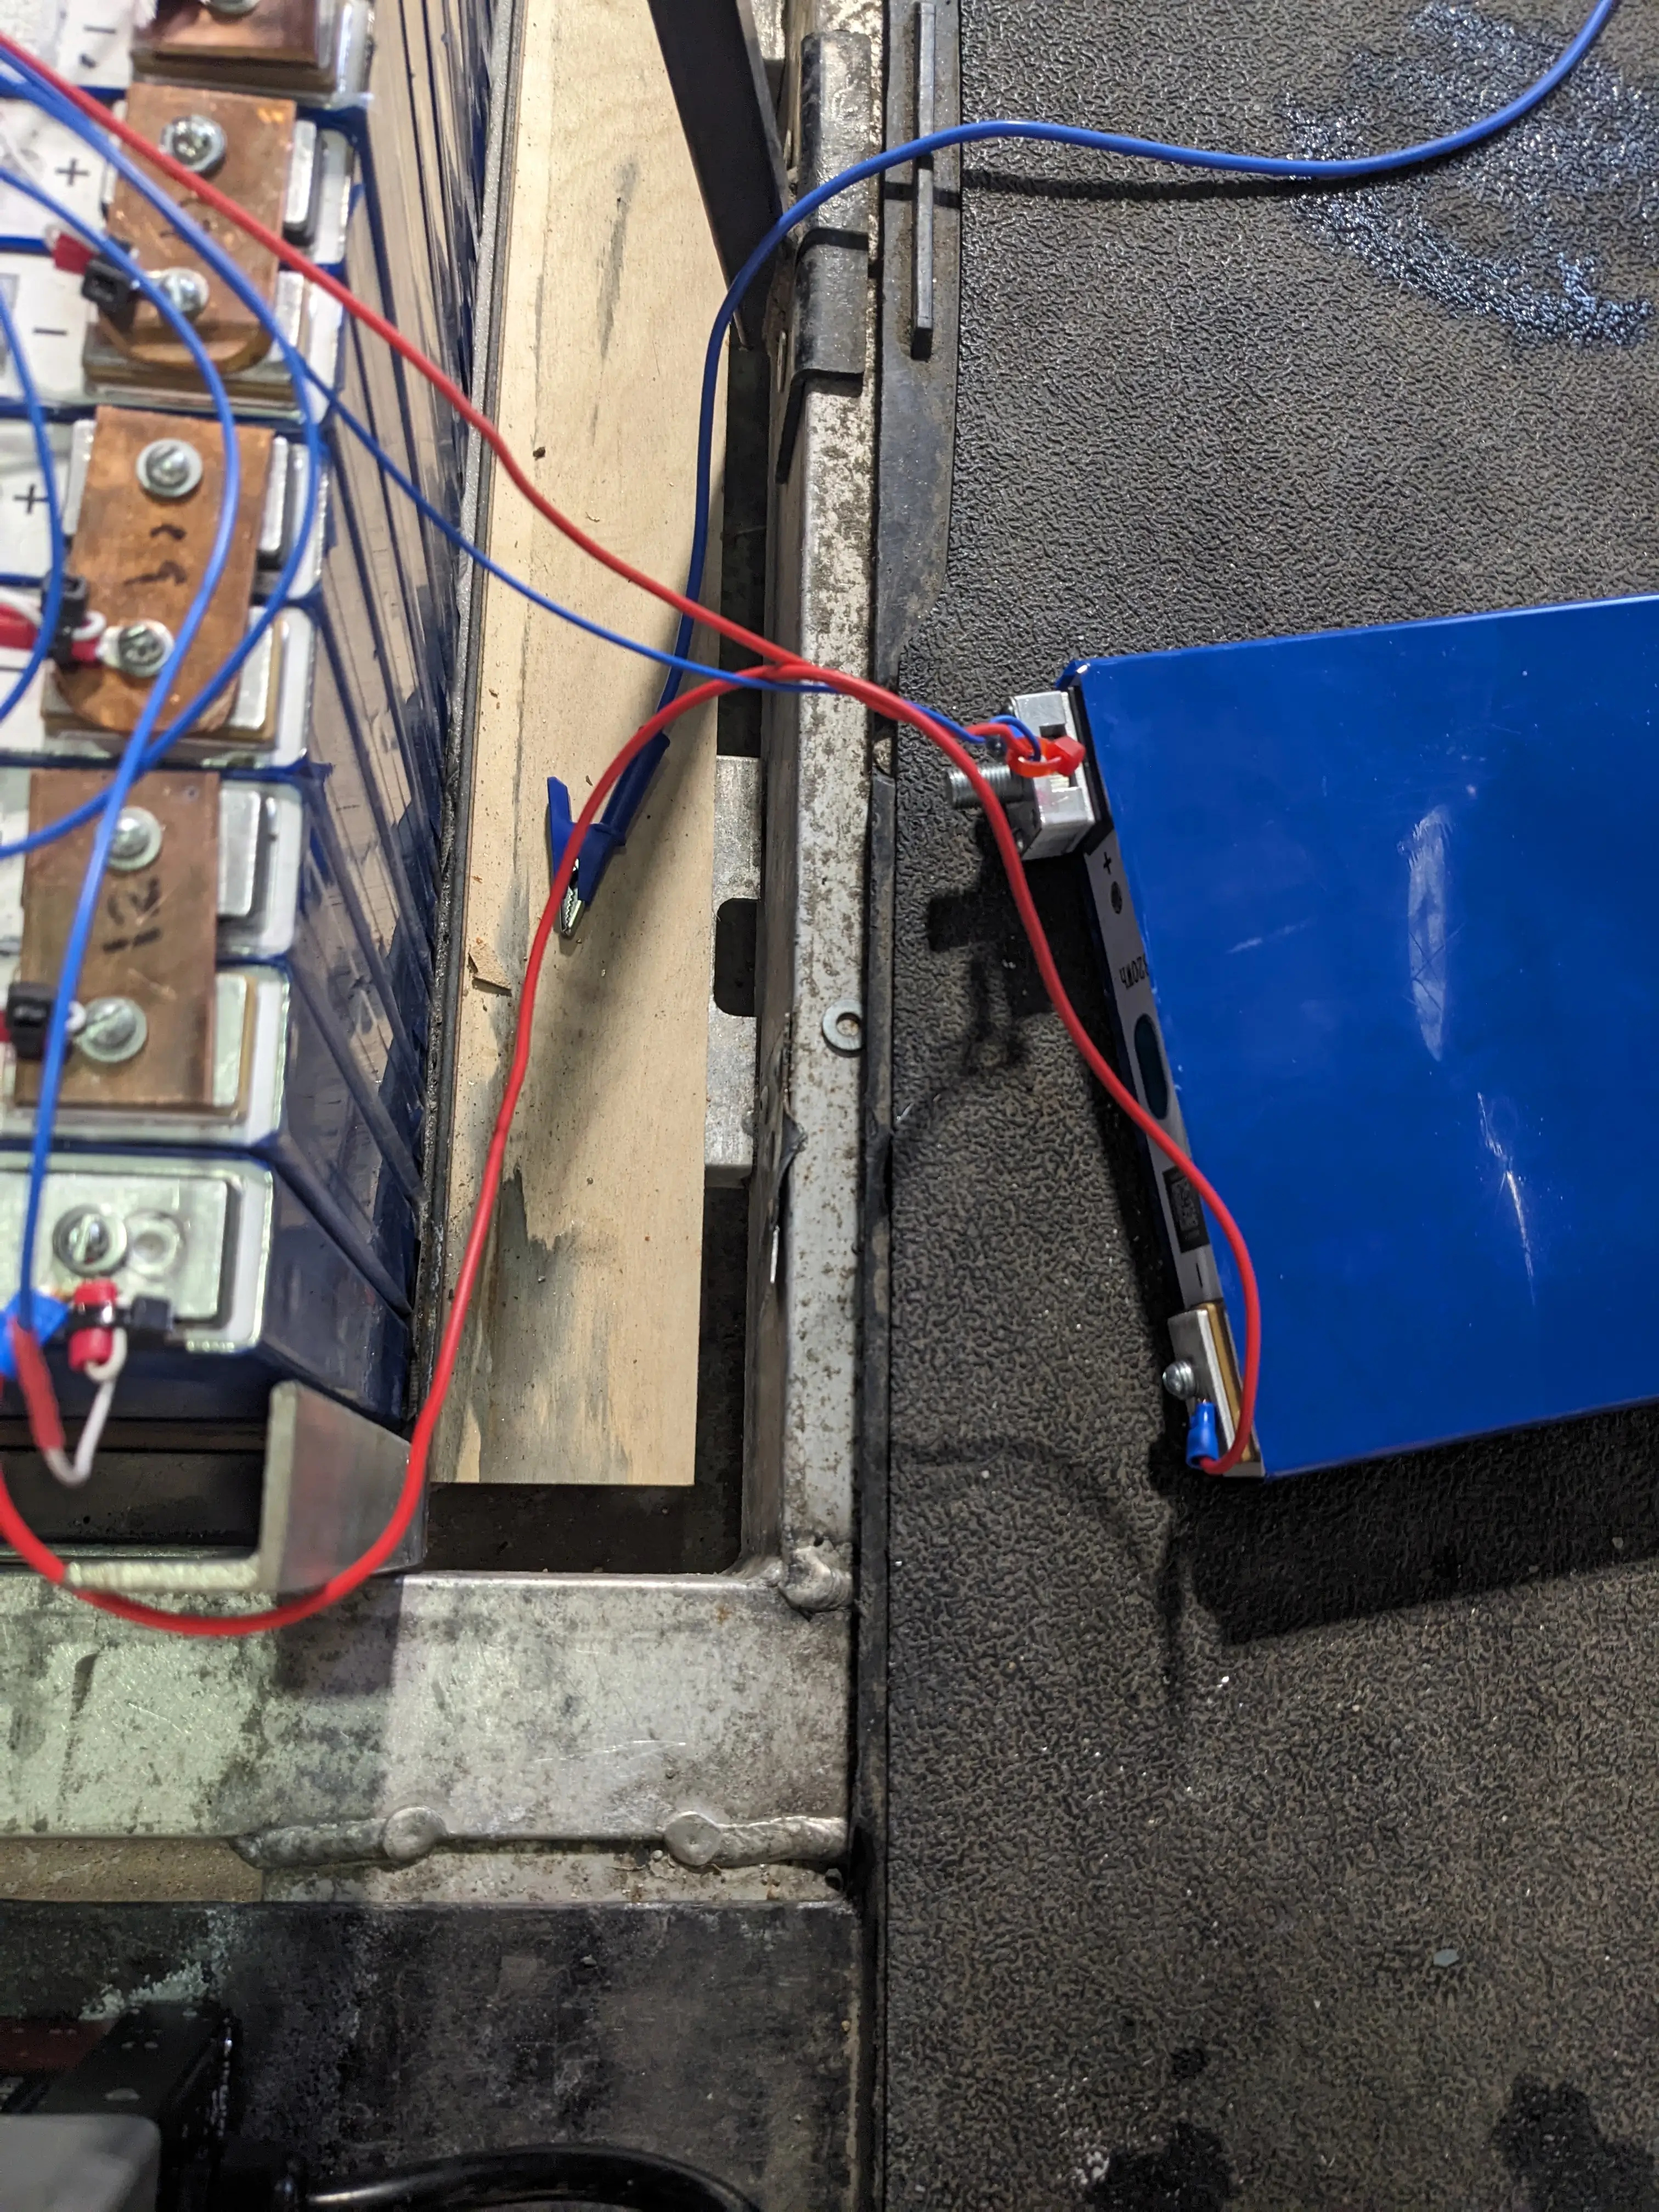
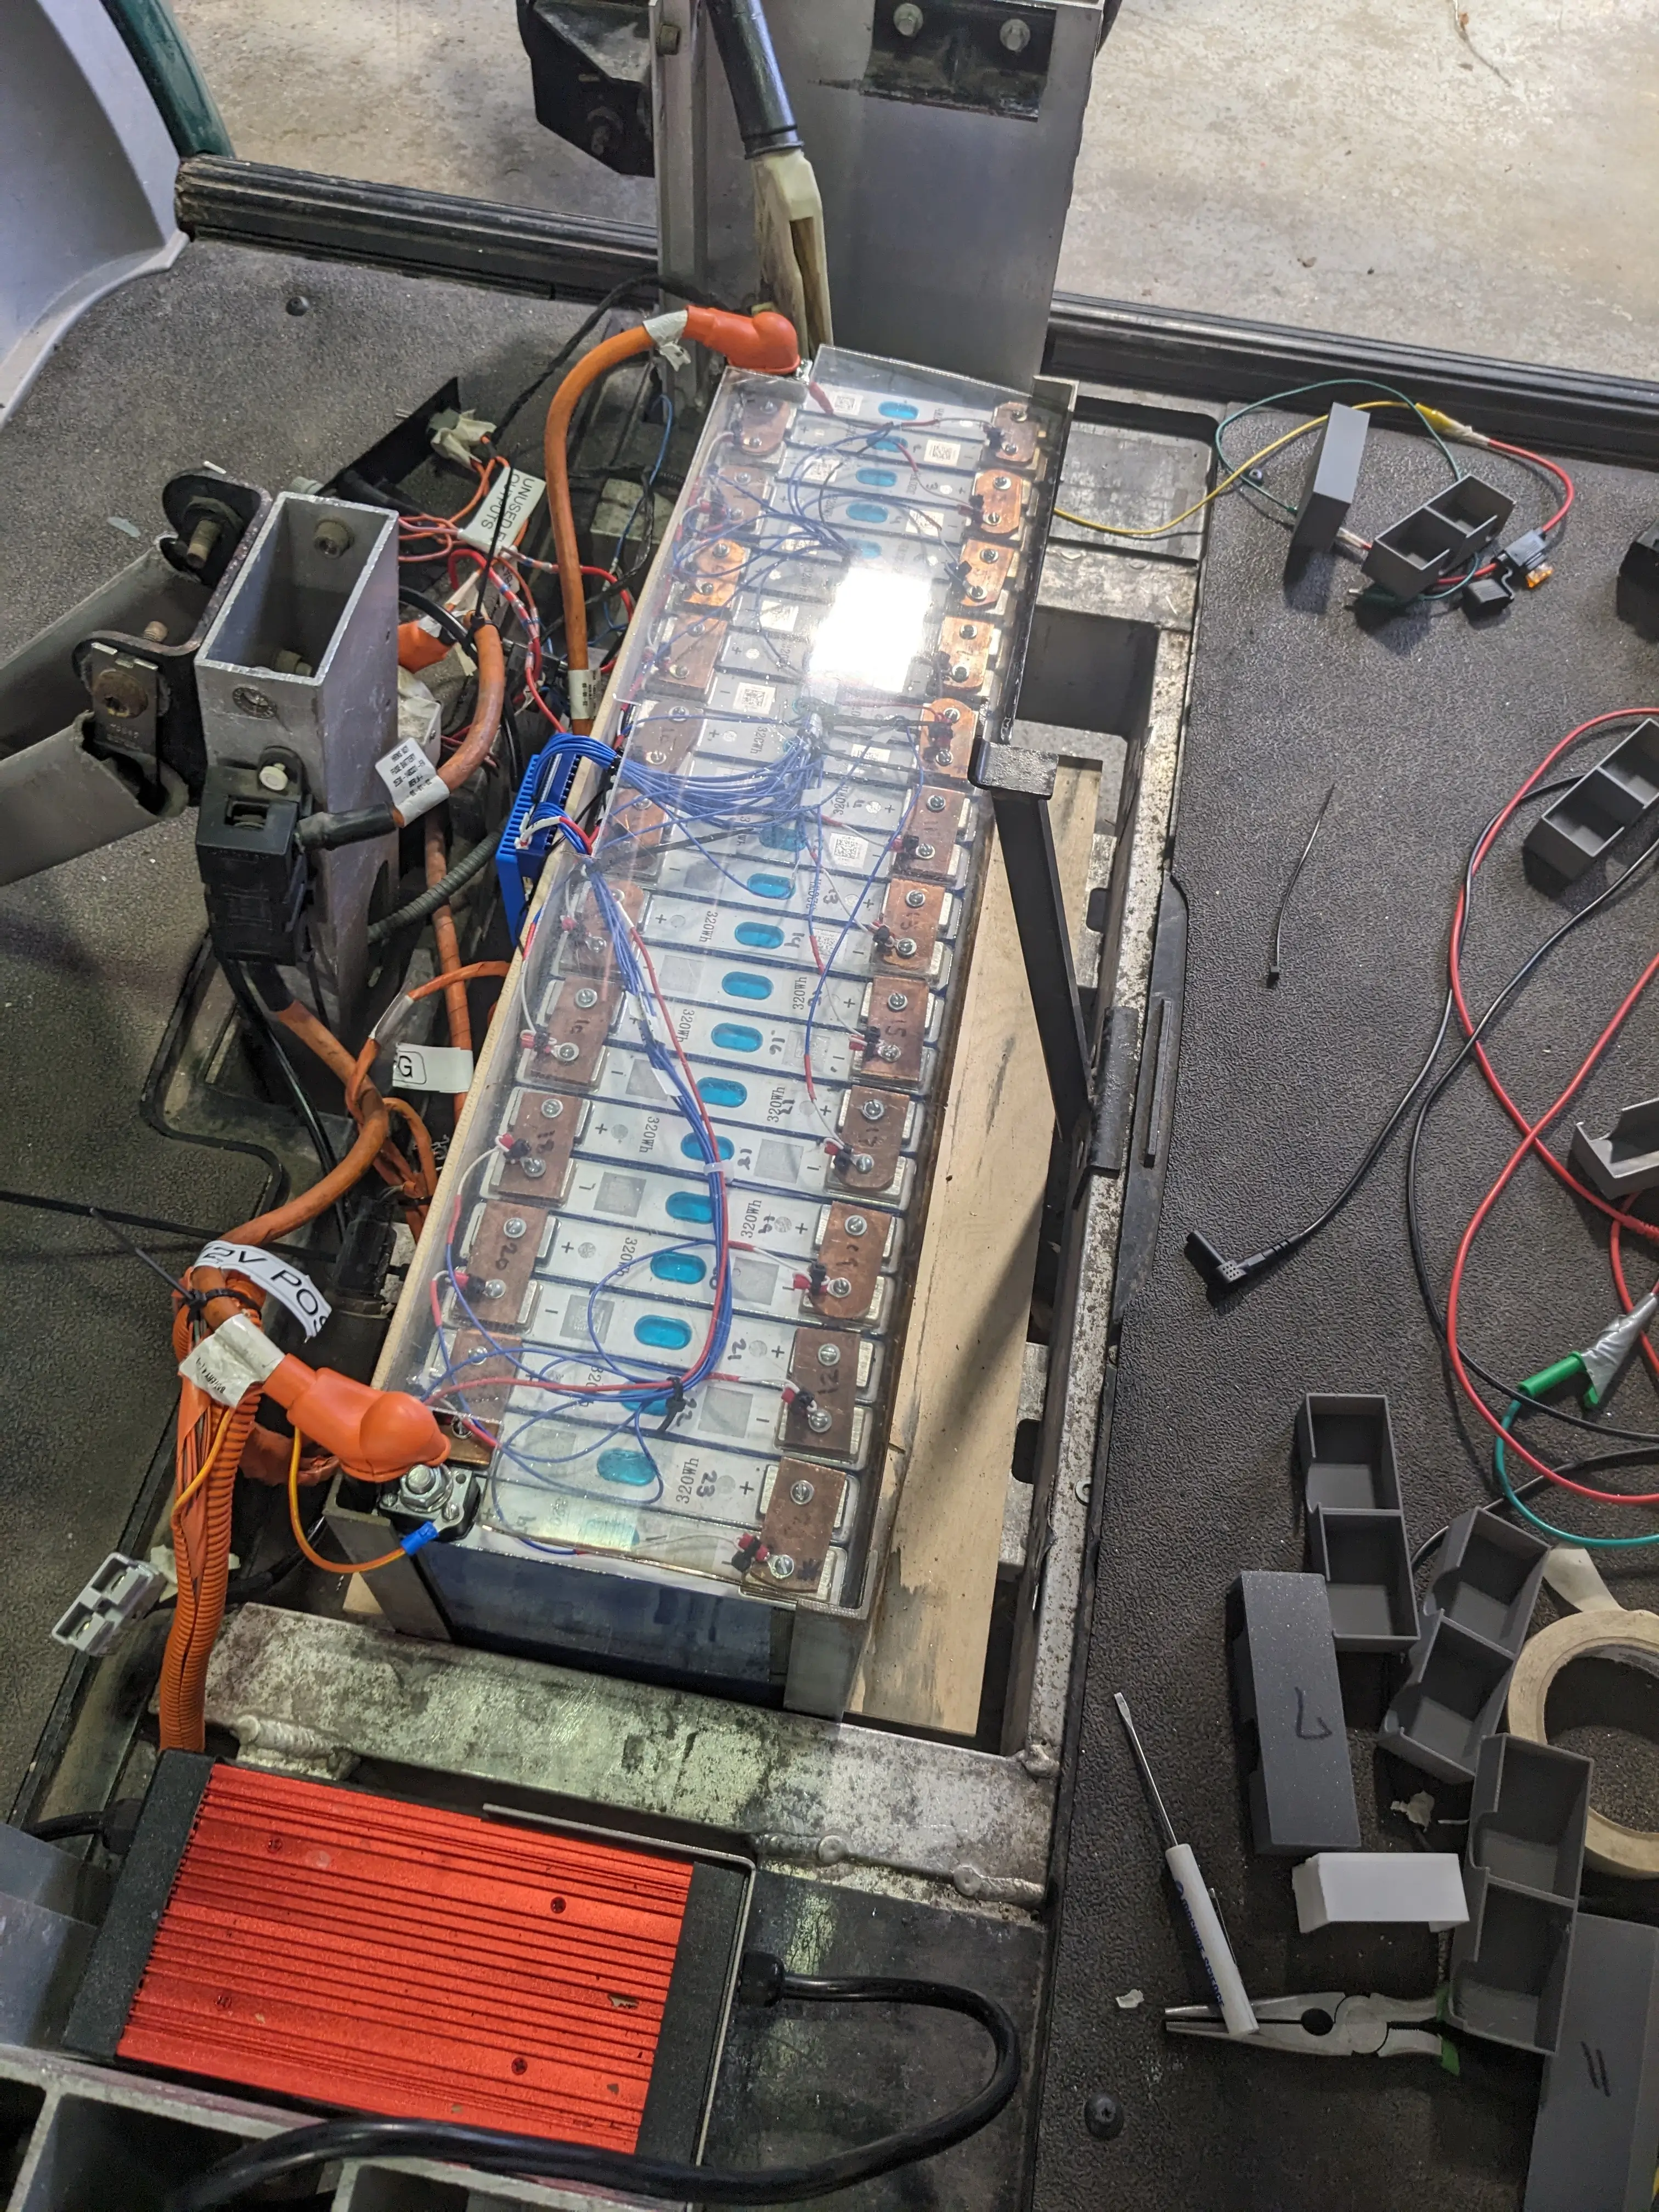
By Tuesday, I had drilled and tapped yet another prismatic cell to be the replacement, and on Wednesday, Jonas and I got it hooked up (externally) to the rest of the cells in the battery
This was done because Jonas thought that maybe the frame was shorting to the external metal casing of the cell, which is possible. We ended up powering it up shortly after, and too our surprise, everything worked great!
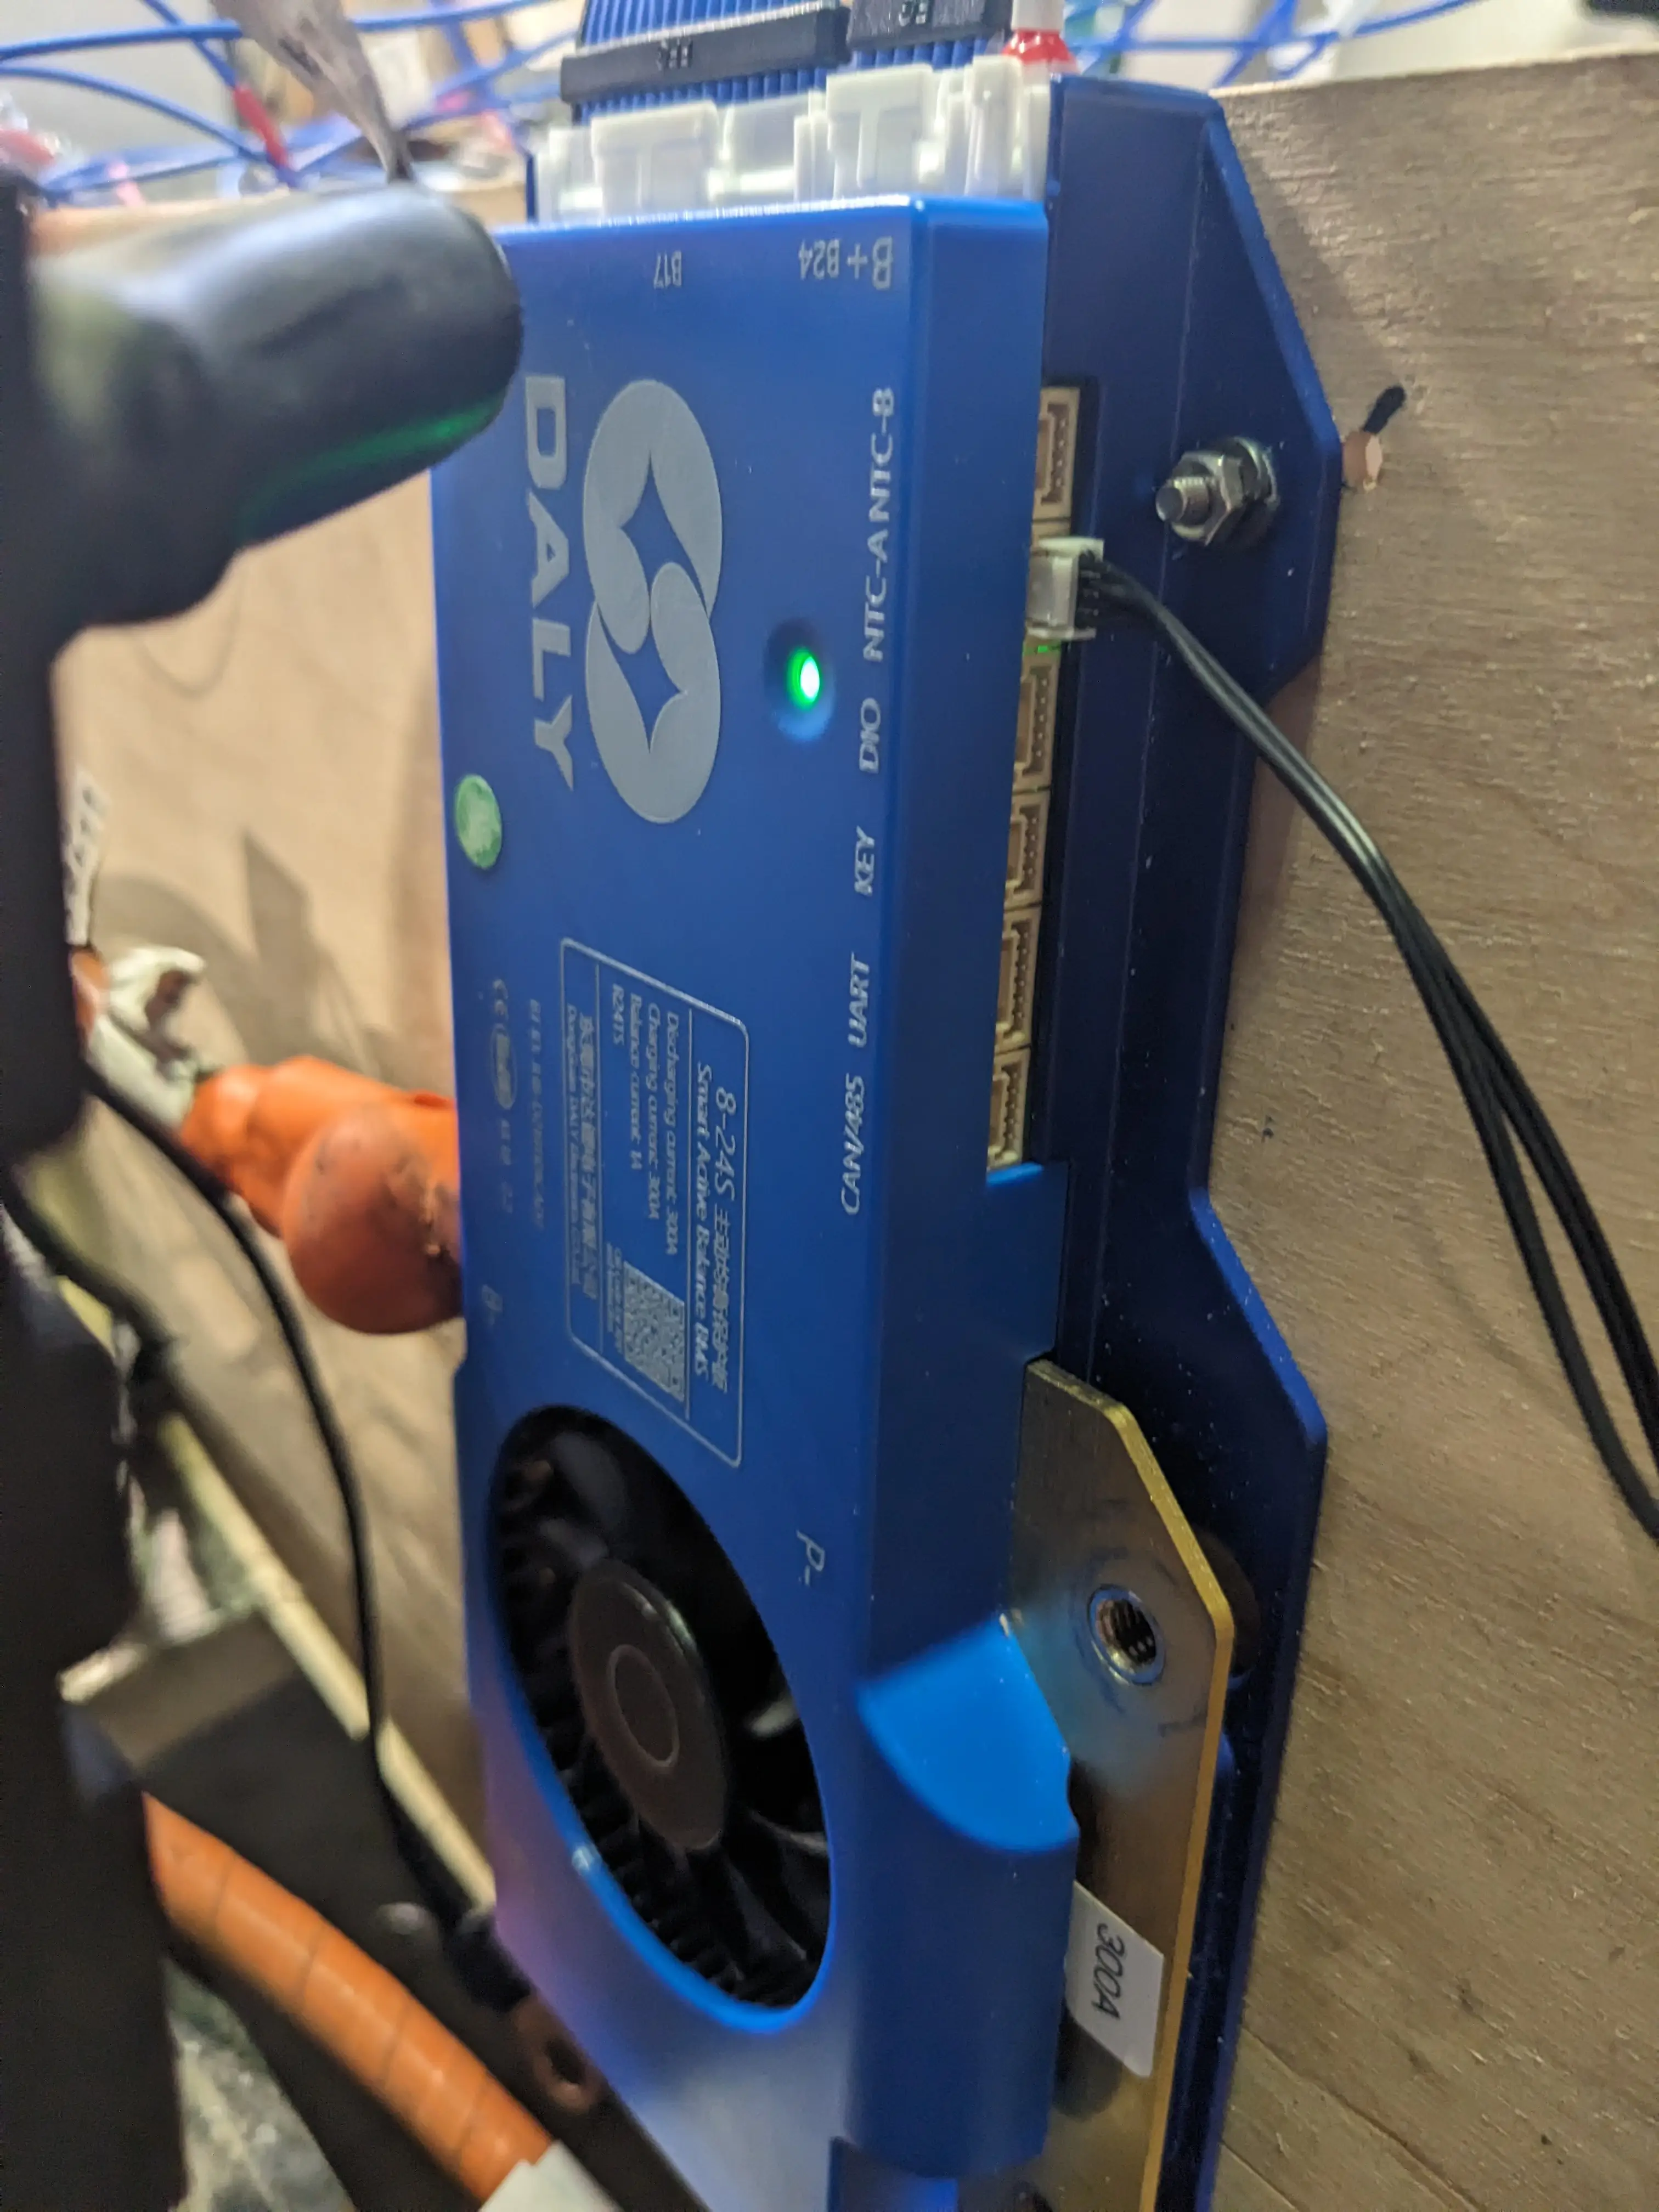
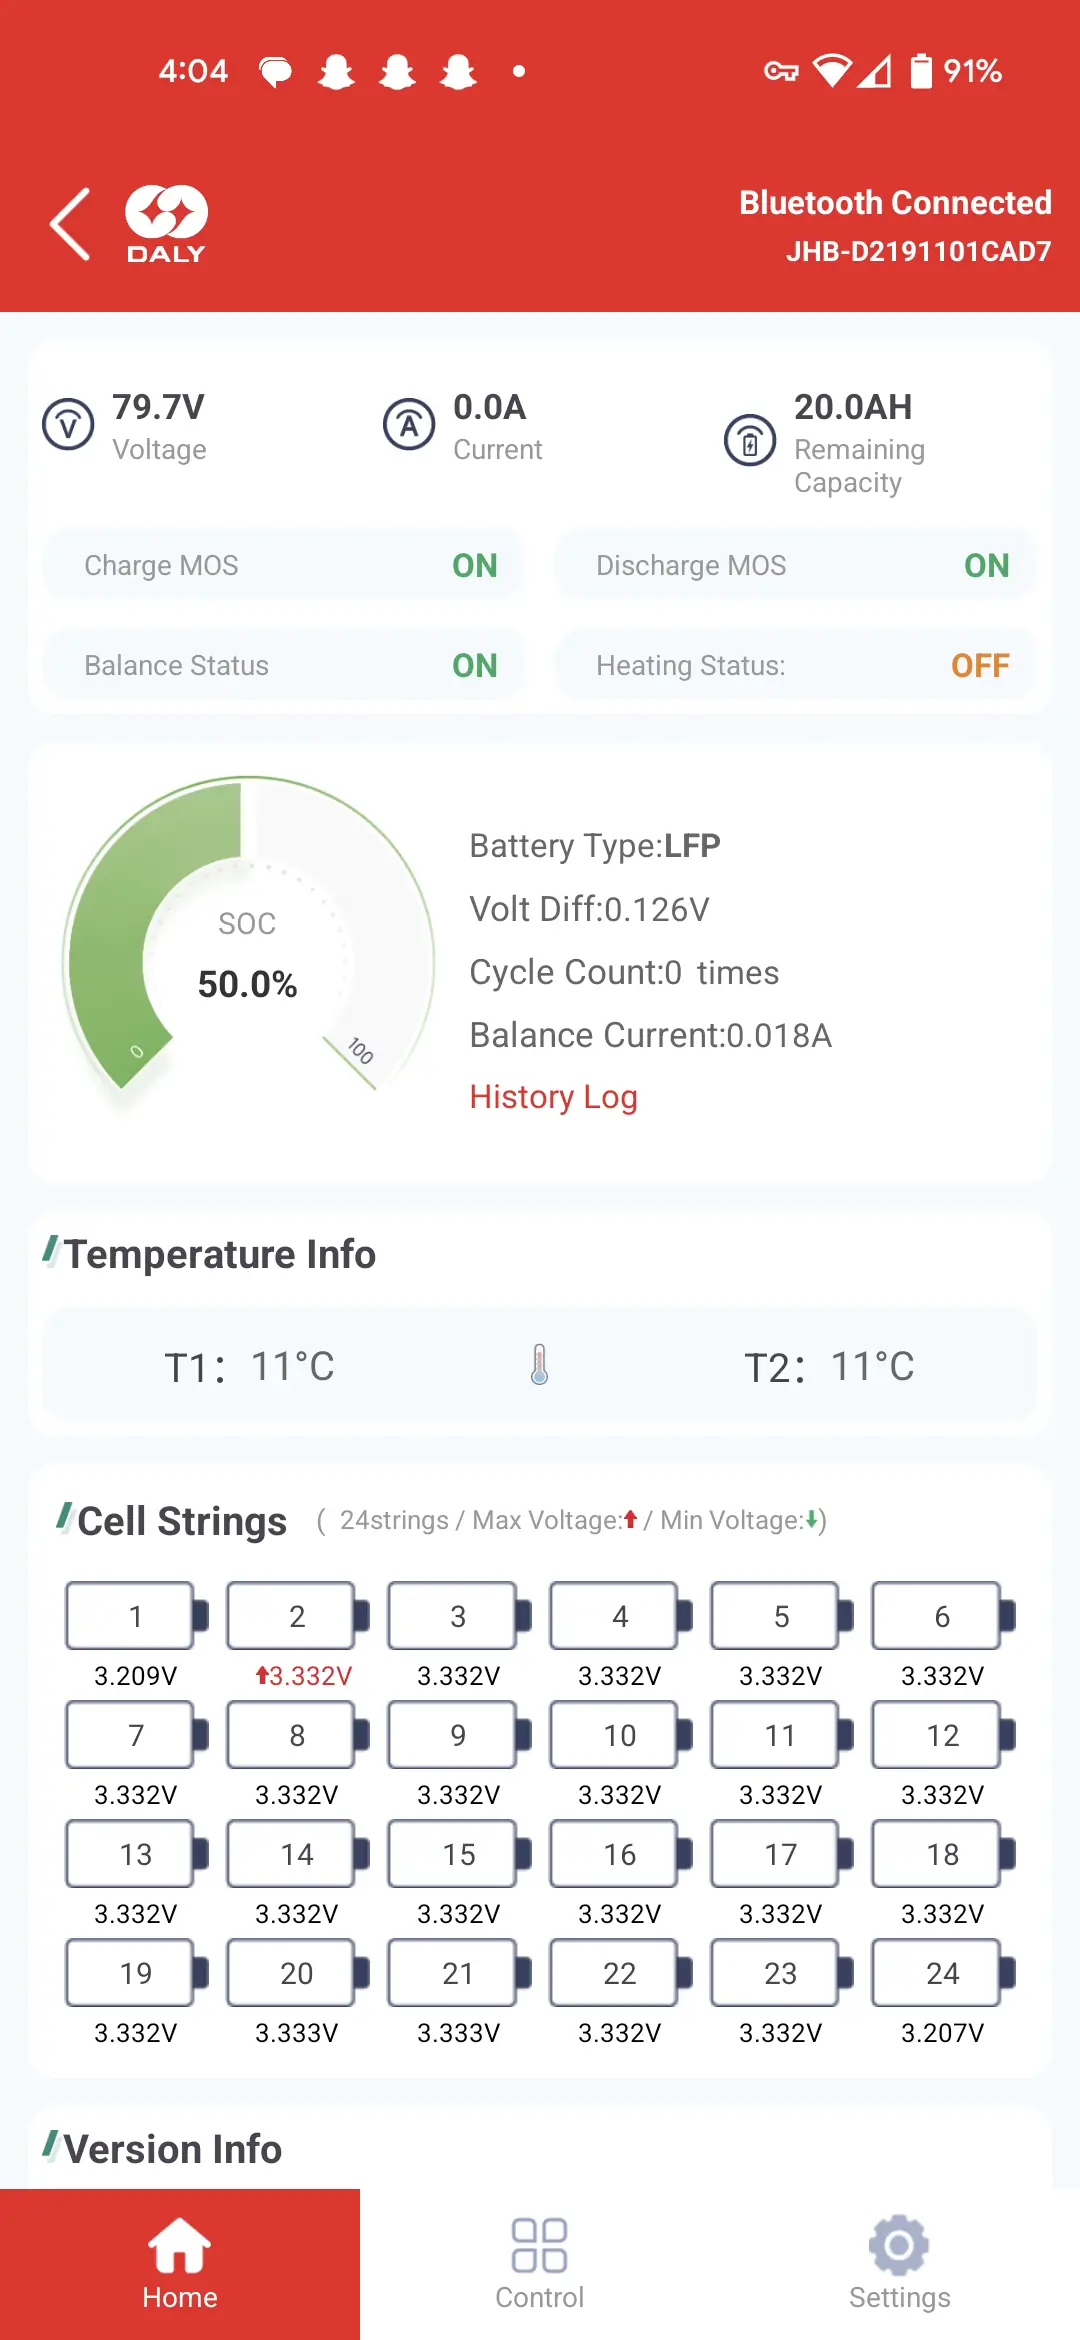
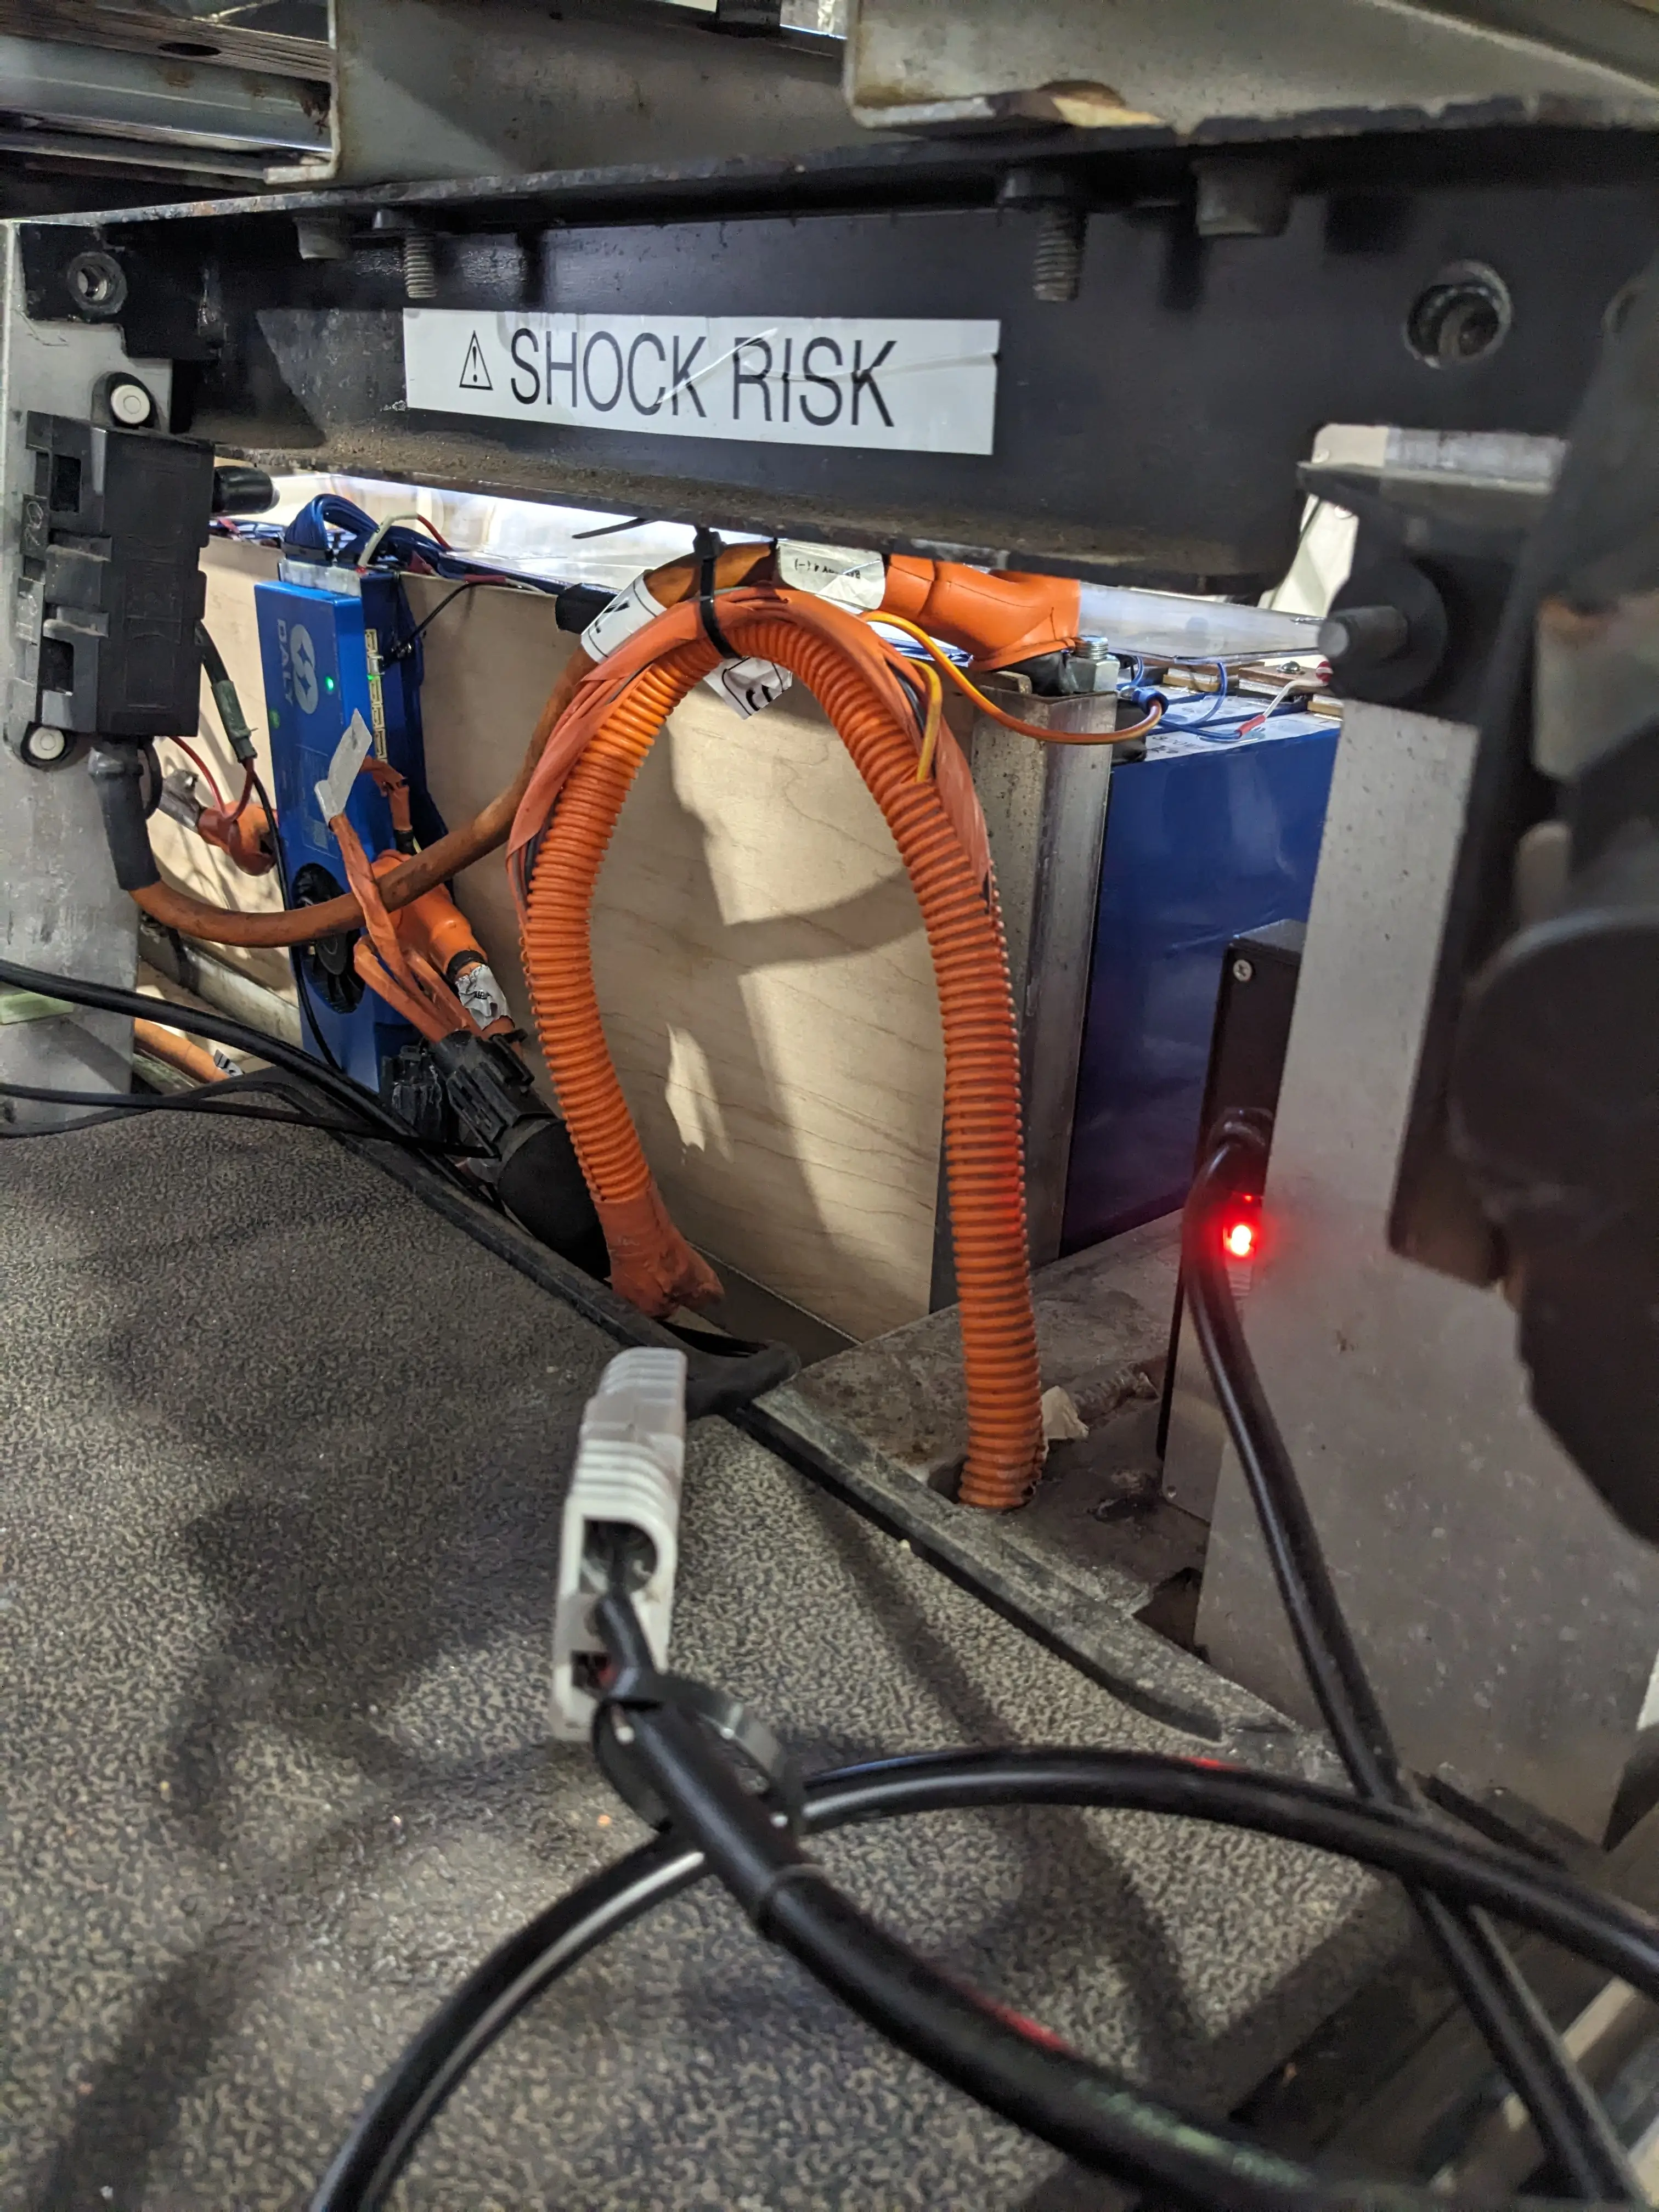
The green light on the BMS indicates that it is actively balancing the cells and everything is within spec!
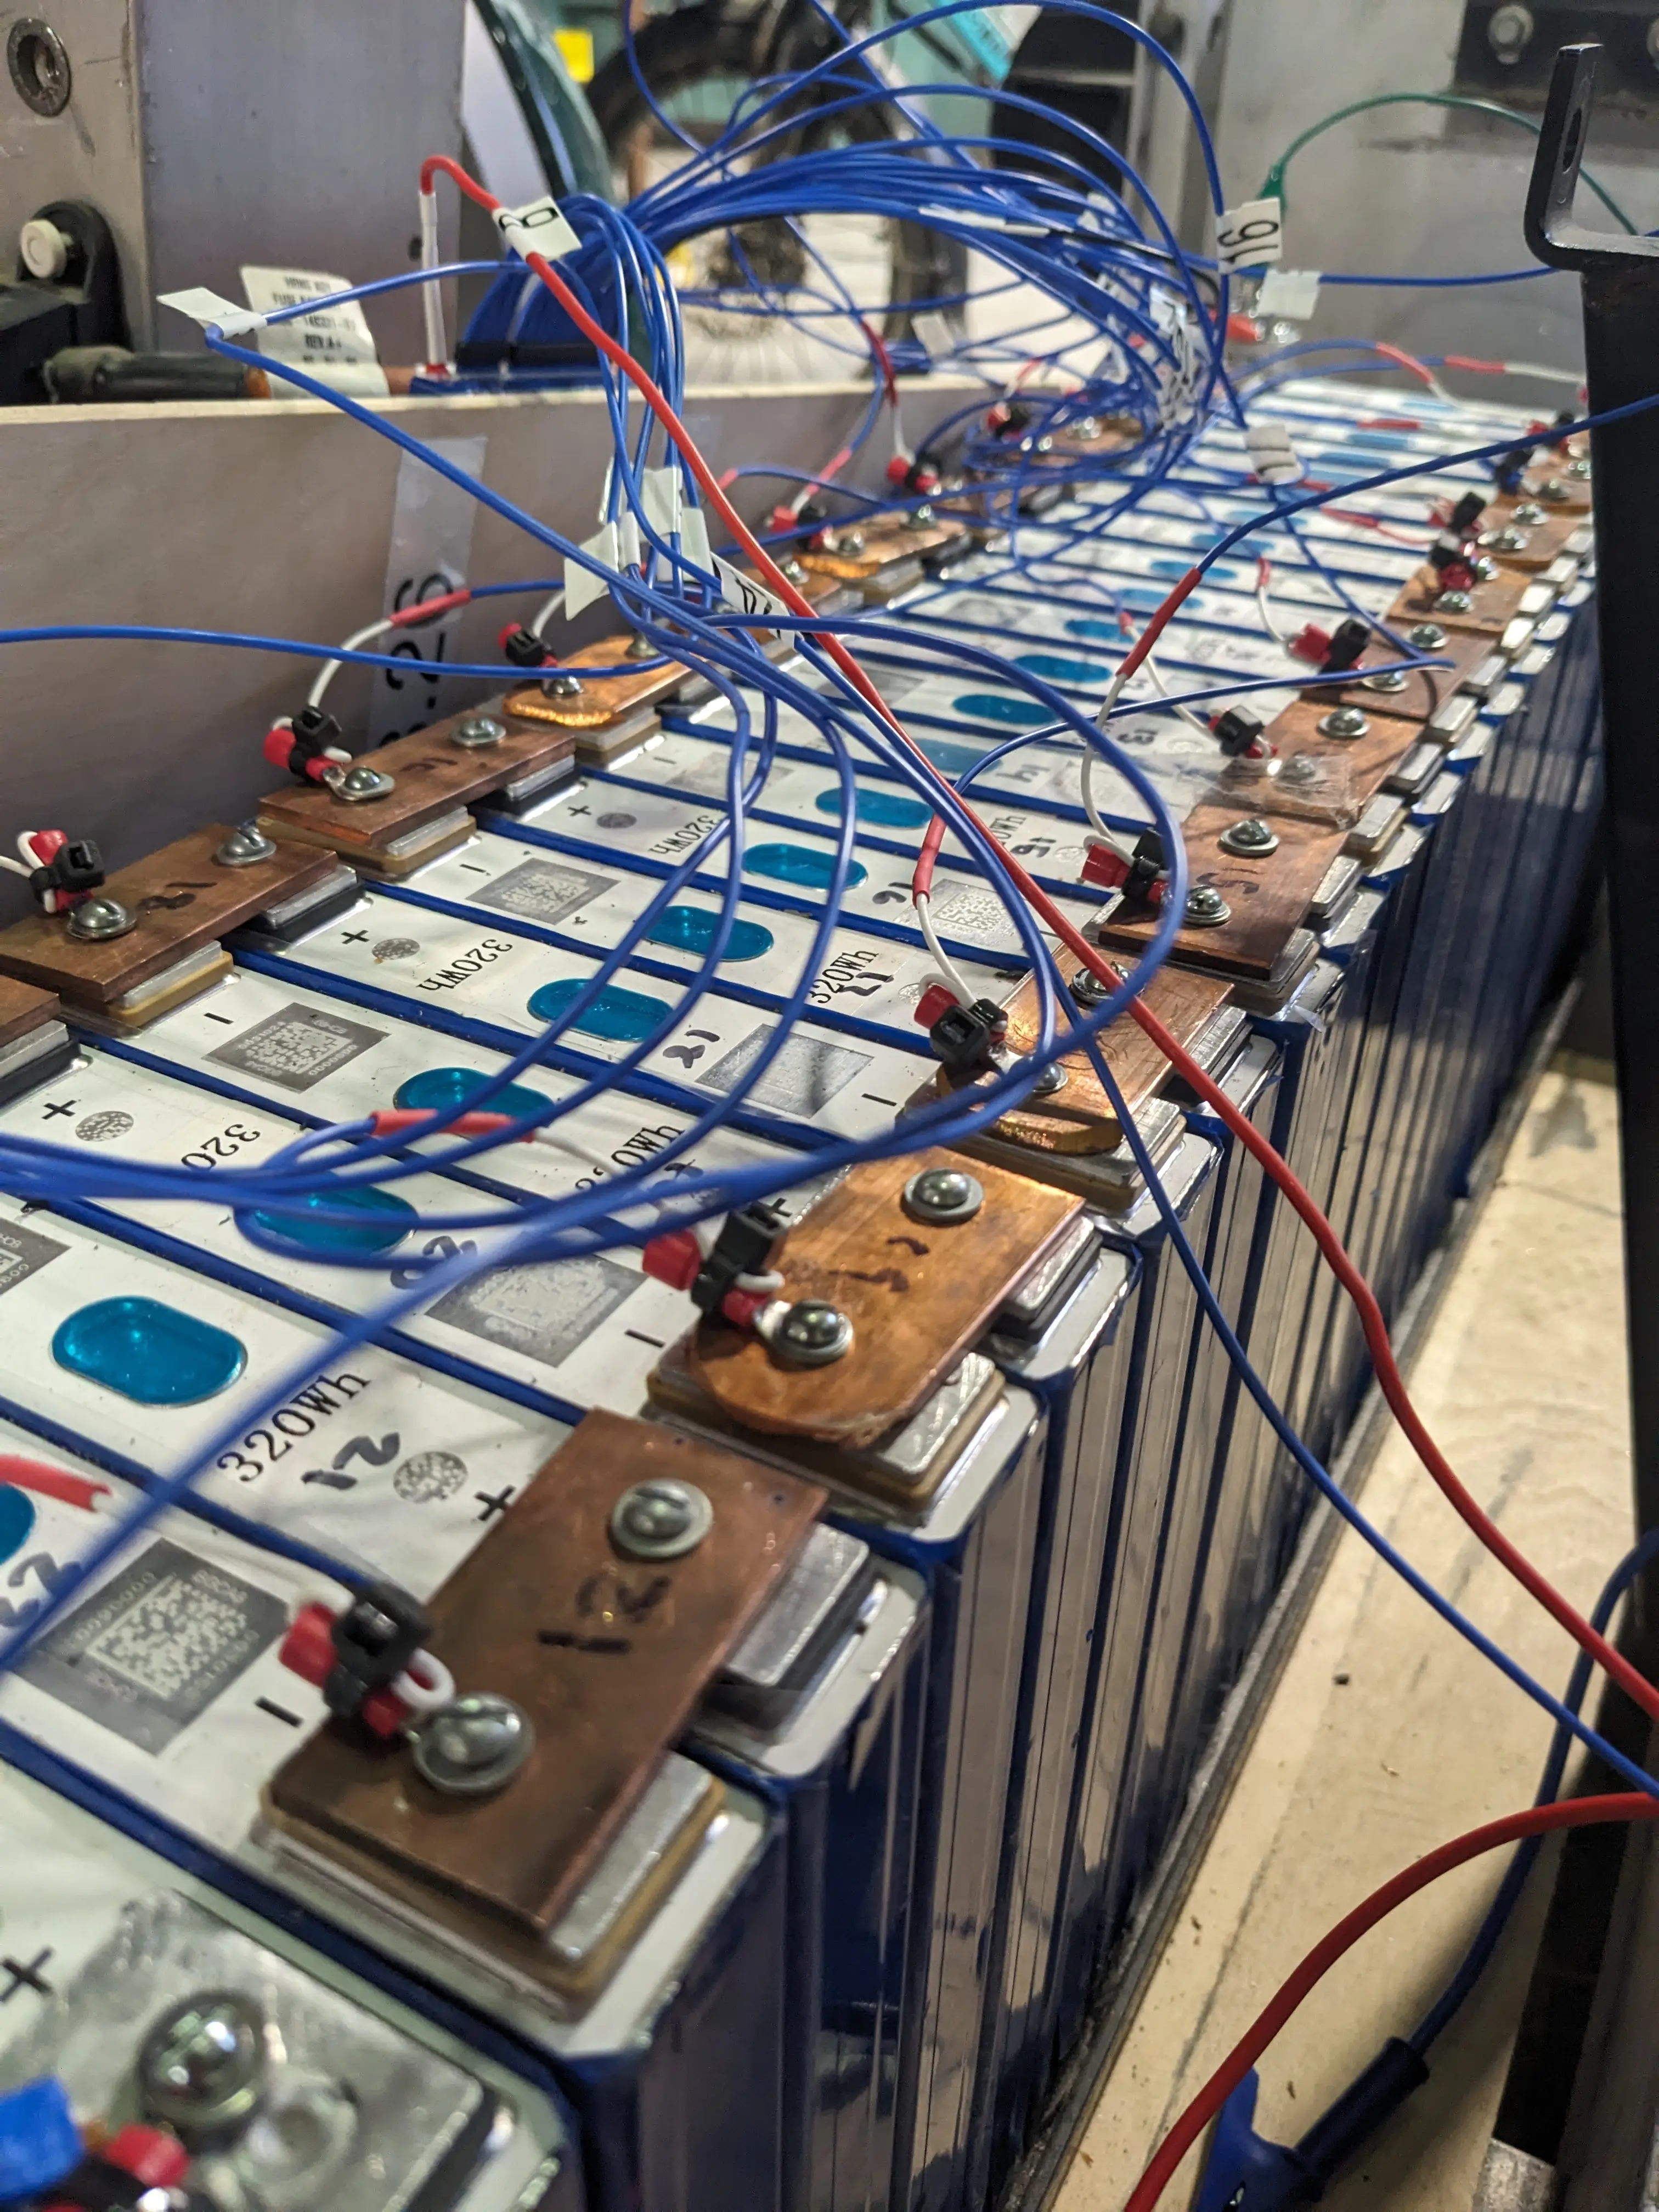
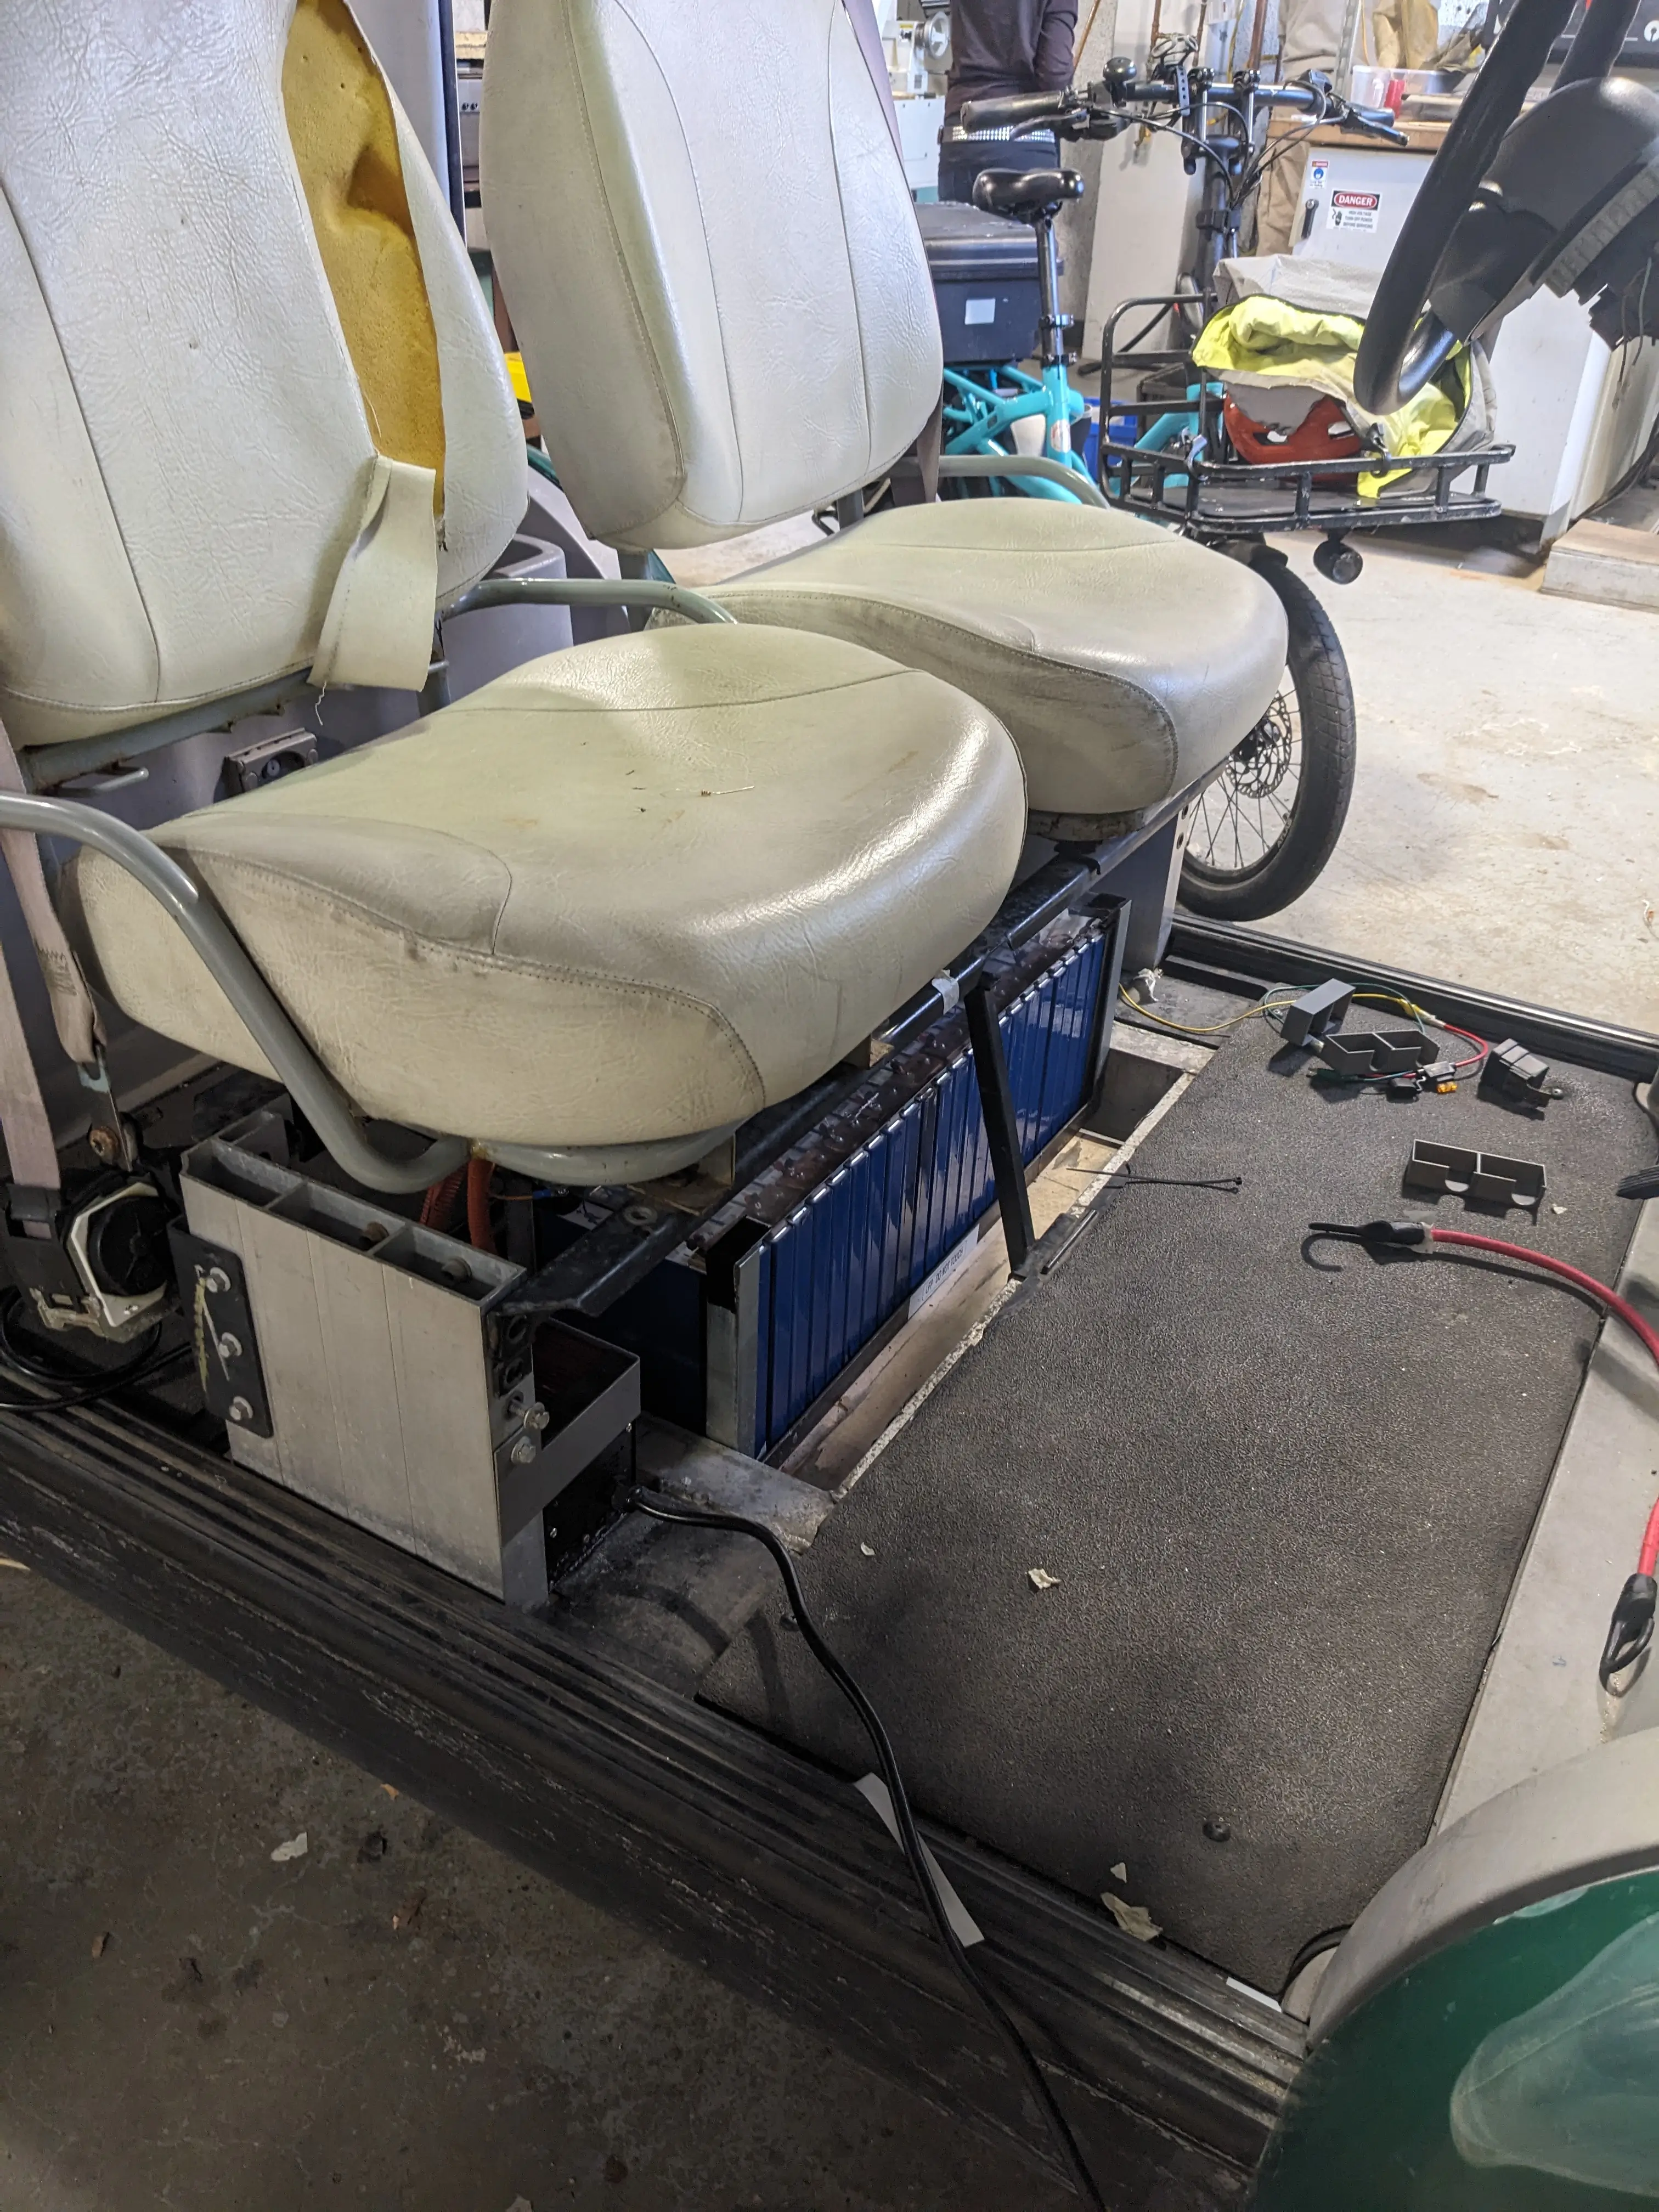
Once we confirmed that everything worked externally, Jonas and I carefully re-installed the battery into the rack and attached the copper bus bars as well. Additionally, I reconnected the golf-cart negative wires (both motor negative and logic negative) to the BMS’ P- terminal as mentioned on the datasheet. However, before powering it up again, I did a final check to ensure that there was no voltage difference between the metal frame and the batteries. Upon probing with the multimeter on VDC, we noticed that the voltage would quickly read ~30v and then drop rapidly to about 2v and then would kind of hang around 0.3-0.9v which makes no sense.
I’m not sure if this is some sort of capacitive coupling or what, but I really want to figure it out before I reconnect the BMS for a final power-on test.
On the bright side however, I got the DALY BMS app on my phone and was able to configure, manage, and monitor all the cells in real time which is awesome!
The BMS shows each individual cell’s voltage, along with how it is actively balancing them. An orange arrow pointing up next to a cell number means it is receiving charge, and a green arrow pointing down means that cell is delivering charge. Pretty fun to see it in action.
So even though we are now one step closer to preparing the golf cart, there is still more to do so that we can ensure that our battery system is foolproof and won’t need to be torn apart again in a few months…
Week 02/23/2026
Once again, we had more snowdays. Coming back on Wednesday, I had had plenty of time to consider potential problems with the wiring.
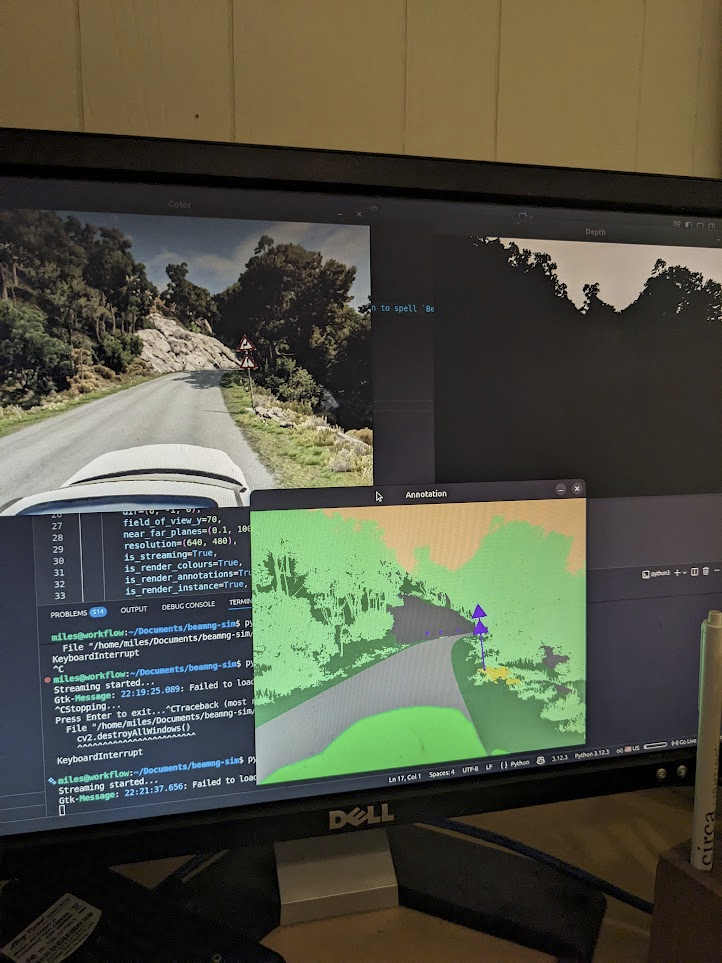
Over break, I also decided to reach out to the BeamNG.drive team to see if we could get an education copy of their physics simulation software. They quickly responded and gave us a license to use it, and I spent a few hours messing around with it over the snow days.
I was able to mount a camera to the top of a vehicle and get a live stream running all through their provided BeamNGpy library written in Python. This will be fun to train and experiment on, without needing to drive the real golf cart and risk potential damage or injuries.
BeamNG.tech also provides LiDARs, sonars, camera feeds, ultrasonic sensing, and various other modules that can be installed on the vehicle during simulation. Thanks a lot for giving us the opportunity to use your software!
Back to the physical golf cart…
Jonas and I were commited to get it up and running before Thursday, so we stayed after to finish things up. After confronting our built up trauma for about 30 minutes, we made last electrical connection. This completely energized everything in the golf cart and there were no sparks!
It wasn’t until Thursday that I realized we put the connections on the battery terminals inverted. Electrically, this isn’t a problem, but it did prevent our 3D printed battery terinal protectors from fitting. This wasn’t the worst thing in the world in my opinion, as they weren’t great to begin with.
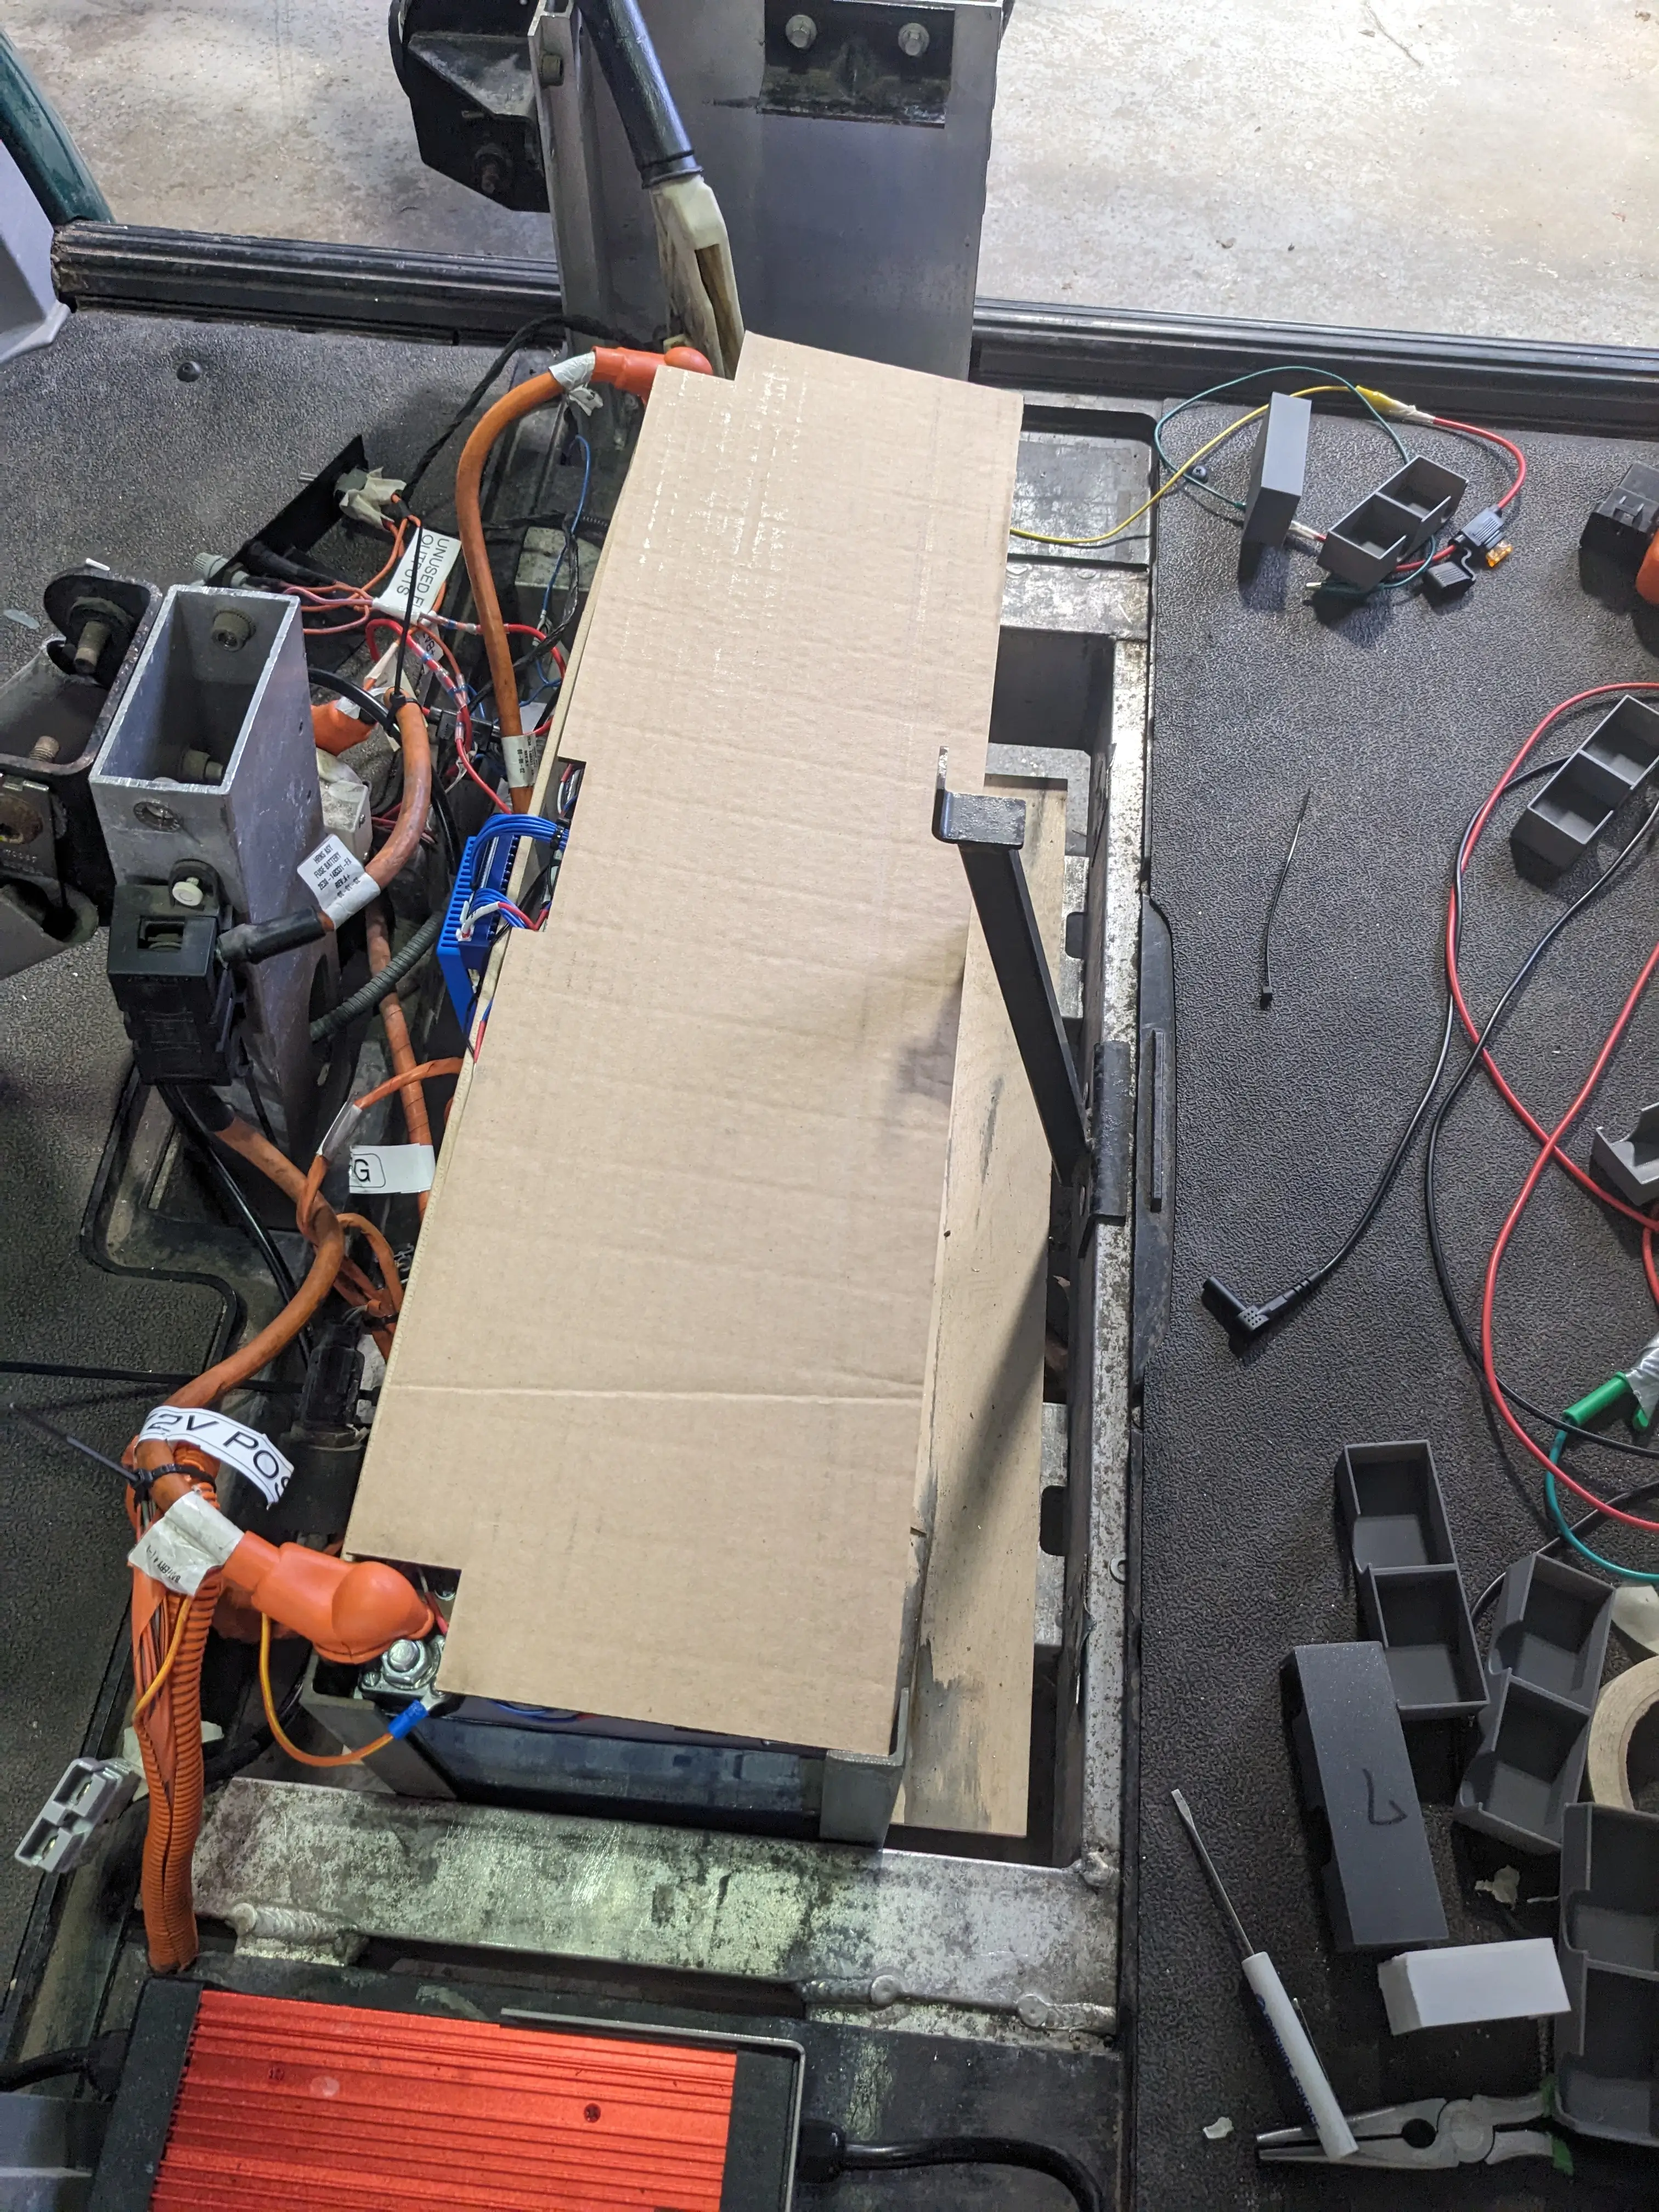
I decided to come up with a better solution. I made a simple sketch in Fusion 360 that would cover all the battery-related electronics from the top down. I then lazer cut a quick sanity-check out of cardboard which looked promising.
After this, I decided to do it again out of acrylic. I was aware that using this much acrylic wasn’t the most cost-effective way of using it, so I decided to find a scrappy piece to cut it to minimize losses. Turns out, it wasn’t acrylic at all. Even though the cut worked, it warped it in a few spots and left burn marks along the edges. No worries, you won’t be able to see it anyways and it doesn’t impact its performance.


With that installed, I put the seats down (a bold move on my part) just to make it look more vehicular again.
I had already tried powering it up which worked fine, so I thought it was time to try charging briefly to make sure the BMS knew what to do…
No issues! I hope to get our first joy-ride in with the new BMS by early next week!!!
0
Views